
A while back I outlined the setup process for running R under the Eclipse integrated development environment with the help of WalWare.de’s StatET plugin for Eclipse, in Windows 7. This post is an update on that procedure for the newer versions of each of the programs now available.
Specifically, this information pertains to an installation of Eclipse 3.6 (Helios), StatET version 0.9.1.b201011060900E36sw, and R 2.12.0, under Windows 7 64-bit (circa December 2010). The process for making R work within Eclipse has become a bit more involved, but the procedure outlined here works for me with both 32-bit and 64-bit versions of Eclipse and R. These steps are all outlined on the WalWare.de site, and I merely recreate them here to hopefully make it easier for beginning users. All of the software here is freely available, and Mac/Linux analogs exist, but these instructions are specific to Windows.
Begin by downloading the current version of R for Windows. In the old days there were separate files for 32-bit or 64-bit R for Windows, but as of R version 2.12.0 the two versions are packaged together. If you install R 2.12.0 or later and look in the \bin folder, you will see two directories, i386 and x64. The i386 folder contains files for the 32-bit version of R, and the x64 folder contains files for the 64-bit version of R. Note that you can only run the 64-bit version of R on a 64-bit operating system, otherwise you are restricted to the 32-bit version, which is perfectly fine for almost everyone. If you have been running R under Eclipse with StatET prior to the release of R 2.12, you will have to upgrade your version of StatET to deal with the new directory structure of R 2.12.
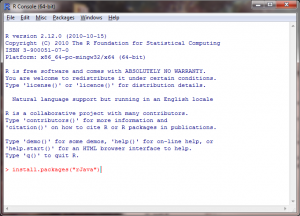
Anyhow, after you have run the R installer (R-2.12.0-win.exe in this case), you need to install the rJava package before any further setup. Click your way into the R\bin\i386 folder and you will find a file called Rgui.exe. Run that file. In the R terminal window that opens, type install.packages("rJava") and hit Return. R will open a window and have you choose a mirror to download the package from, and then R will install the rJava package. You can close the R terminal at this point (hint: q() quits the session). If you look in your R\library folder you should now find a rJava folder.
The next step is to install the rj package from WalWare.de. At the walware.de site you will find the rj package on the downloads page partway down the page, with a filename like rj-0.5.0-5.tar.gz. Download the file to your computer. I recommend dragging it to your R\bin\i386 folder for next step.
To uncompress and install the rj package, we’ll have to use the Windows command line. To open a windows command terminal in Windows 7, it’s easiest to just hit the Windows key on your keyboard and type command into the search box that pops up in the Start menu. Hit return and a command window should open.
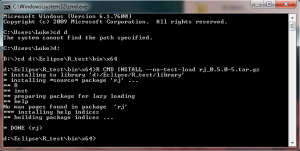
In the Windows command terminal, you’ll now need to navigate to the R\bin\x64 directory where you just placed the rj-0.5.0-5.tar.gz file you downloaded. Recall that the cd command allows you to specify what directory you want to work in. In my case, the terminal starts in C:\Users\Luke, which is not where my R installation lives. I keep my R installation on my D: hard drive. So I start by typing d: at the command prompt and hitting return. The command prompt changes to read D:\>. I can then type cd D:\Eclipse\R_test\bin\i386 which is where my particular installation lives (the example image below shows me doing this in the x64 folder, but all that matters is you carry out the next command in the i386 or x86_64 folder where you put the rj file). Typing dir should show you the contents of the directory, where you should find several R files, most importantly the rj-0.5.0-5.tar.gz file and R.exe. We will call R.exe from the command line and use it to unpack the rj file and install the rj library. At the command prompt, type R CMD INSTALL --no-test-load rj_0.5.0-5.tar.gz Please note that as the rj file is updated in the future with a new version number, you will need to enter the appropriate current file name. The command terminal should show the progress of the installation. If you are not on a 64-bit operating system, you must carry out this step in the R\bin\i386 folder.
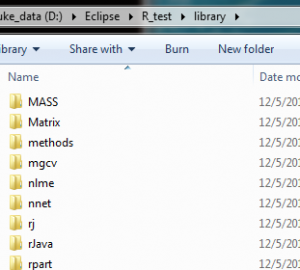
If this is successful, you should be able to look in your R\library folder and find a new rj folder, right next to the rJava library you installed earlier.
At this point you can run Eclipse and begin the StatET installation. Download a version of Eclipse from the website. These instructions should work for both Eclipse 3.5 and 3.6, both 32-bit and 64-bit versions (you can only run the 64-bit version on a 64-bit operating system). Unzip the files, then find and run the eclipse.exe file.
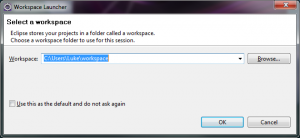
On your first launch of Eclipse, you’ll get a popup window asking you to specify a workspace directory, which is where Eclipse will store its preference files (and possibly your R files depending on your setup).
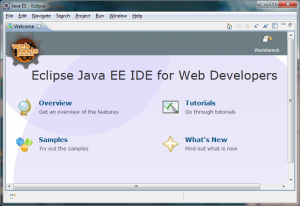
The Welcome screen of Eclipse will appear next. Click on the Workbench icon in the upper right of the window to bring up the main Eclipse window.
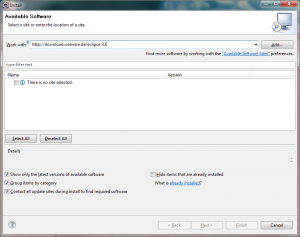
The next step is to download and install the StatET plugin files from the WalWare site. Go t0 Help>Install New Software. In the window that opens, you will enter the address for the Walware repository appropriate for your version of Eclipse. The list of repository addresses is given here under the Installation & Update section. If you are running Eclipse 3.5 (Galileo), the use the address for Eclipse 3.5, and if you run Eclipse 3.6 (Helios) use the Eclipse 3.6 address. Enter the address in the “Work with” field in the Eclipse window and hit “Add…”.
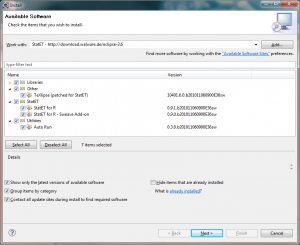
Eclipse will then query the WalWare site and get the appropriate plugins. These will be presented to you in the central window. I recommend you hit Select All and hit Next to step through the download and installation. After the installation, Eclipse will prompt you to restart (Eclipse only, this doesn’t require a restart of your computer).
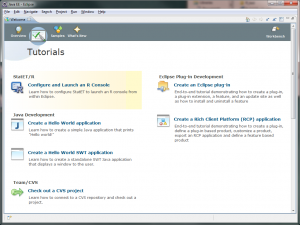
When Eclipse reboots, you should be greeted with a new Welcome screen that includes a choice to help configure a R console.
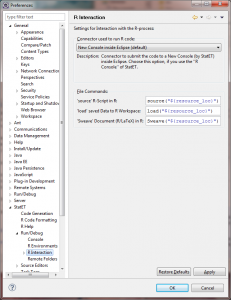
We start by specifying the “connector” between Eclipse and R. Go to the Window>Preferences menu item in the main Eclipse window. In the Preferences window that opens, find the StatET entry in the list on the left. Click on StatET to open it, and go to StatET>Run/Debug/R Interaction. When you click on R Interaction, it should bring up a panel in the Preference window. Make sure that the “New Console inside Eclipse” is selected from the menu. Click Apply.
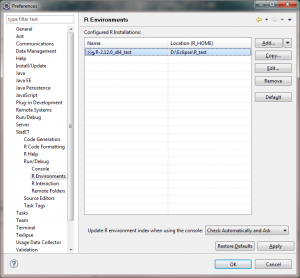
Next, in the list of items on the left of the Preferences window, choose StatET>Run/Debug>R Environments. In the new panel that opens on the right, click on the Add… button. A new window will appear where you will specify to Eclipse where all of the R program files live.
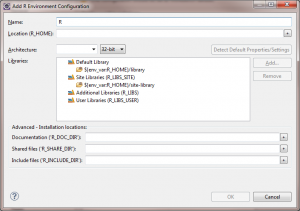
Before you do anything else, enter a descriptive name in the Name field at the top of the window. In this case I called my environment R-2.12.0_x64_test. This will allow me to distinguish it from a 32-bit environment I might make later, or an environment for a future updated version of R like R-2.13.0.
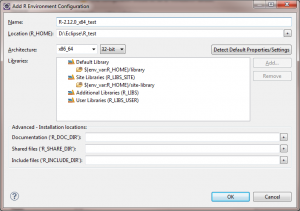
After naming your environment, click on the + button next to the Location field. Choose Browse filesystem, and go to the directory that contains your R program files. Choose the top-level R folder, not the R\bin or R\library folder.
The choice for the Architecture depends on which version of R you plan to run. Most people will probably want to run the 32-bit version, but others may want the 64-bit version. If you want to run the 32-bit version, choose “i386” from the white menu next to Architecture, and choose “32-bit” in the gray menu next to that. In my case, I’m going to run the 64-bit version, so I chose “x86-64” and “64-bit” from the two architecture menus. In either case, after you make your selections, hit the “Detect Default Properties/Settings” button. In most instances, this should automatically find the various components of the R program and display them in the lower half of the Environment Configuration window.
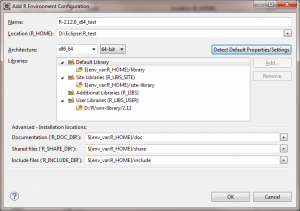
If the detection works, you can hit OK and return to the Preferences window where the list of R Environments is displayed. You must now click on the R environment you just created in the list of R environments displayed. If this is your first time setting things up, there should only be the one entry you just created. Click on that choice, then hit “Default” to mark this as your default R environment. Hit Apply at the bottom of the Preference window.
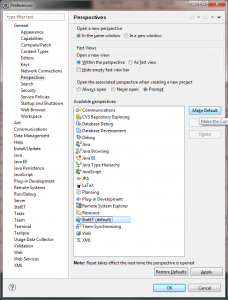
If you plan to use Eclipse to primarily work with R, you will probably want to set StatET as your default “Perspective” in Eclipse (rather than the Java perspective or a C++ perspective or many others). In the Preferences window, go to General>Perspectives in the list on the left. A list of the available Perspectives will be shown in the right panel of the Preferences window. Find StatET, click on it, and then hit “Make Default”. Hit Apply again, and then you can hit OK to exit the Preferences window.
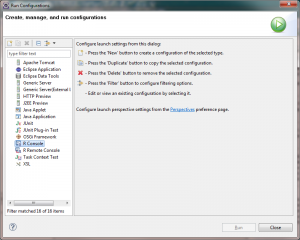
Now that the R environment is established, you must create a “Run configuration” to launch a R console. In the main Eclipse window, go to Run>Run Configurations… This will bring up the Run Configurations window. Click on the R Console item in the list on the left and click the ‘New’ button (which looks like a sheet of paper with a + sign in the corner). Note: during my install, Eclipse froze here more than once. Eventually I was able to move through this step without freezing, but it’s not clear what the problem was.
The new console setup section has several tabs. The first step should be to name your new console in the Name field at the top. Again, this is a point where giving a descriptive name to the console is important, particularly listing the R version it will open and the architecture it will use (32-bit or 64-bit), in case you want to run other versions of R in the future. Naming it “Mary’s R” will not be helpful if you later want to install a new version of R and keep the older version intact as well. I named my console R-2.12.0_x64_test to denote both the R version and the architecture.
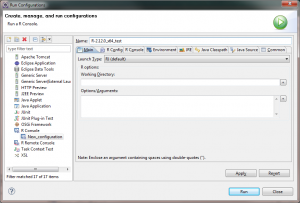
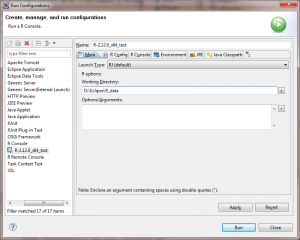
In the Main tab, leave “Launch Type” set to RJ. Below that, you can specify the initial working directory that you want R to open in. This will probably be whatever folder you keep the data that you’ll be manipulating in R. In this example, I’ve pointed it to D:\Eclipse\R_data.
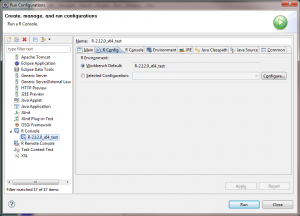
Move to the R Config tab next. The R Environment listed here should be the Workbench Default that we created earlier.
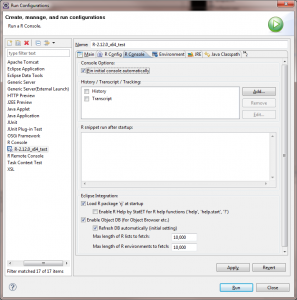
In the R Console tab, I like to check the “Pin initial console automatically” box so that the R console opens in the Eclipse main window. Lower down on the tab, you’ll find options for Eclipse integration. I prefer to uncheck the “Enable R Help by StatET for R help functions” item, so that help pages open in my web browser instead of in a window inside Eclipse. Make sure that the Object DB boxes are both checked, which allows you to see the objects in the R workspace when you’re working.
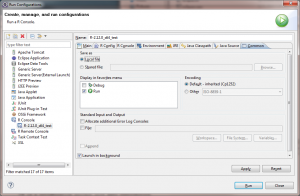
The Common Tab has an option to have this R Console appear in the Run menu. Check the box next to Run to enable this.
You can leave the Environment, JRE, Java Classpath, and Java Source tabs alone for now. I will note that if you’re trying to set up a 2nd R console under a different architecture (32 vs. 64-bit), you can use the JRE tab to specify the appropriate Java architecture to match your R session. If you’re trying to add a 32-bit R console session, you need to run it with a 32-bit Java runtime engine, just as you need to run 64-bit R with a 64-bit Java runtime engine.
At the bottom of the Run Configurations tab, click the Apply button to save these changes, and then hit Run to launch your R console. The first time you run R, Eclipse will pop up a window to ask if you want to index the R environment. I would check the Global option and hit Yes. The initial indexing of the R environment will take a few minutes if it’s a new install, but should be much quicker on subsequent launches.
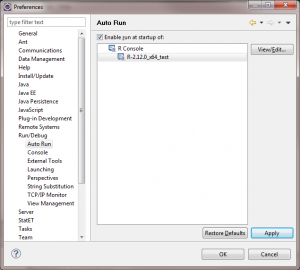
It can also be handy to set up StatET to launch a R console every time you open Eclipse/StatET. To do this, go to the Window>Preferences menu item in the main Eclipse window. In the Preference window, go to Run/Debug>Auto Run. In the Auto Run panel on the right, check the box for “Enable run at startup of:”. Below that, click on the R Console item, and then click on the name of your R configuration. Hit Apply to save this option, and hit okay to leave the Preference window.
Finally, if your R console is working, you can start a new “R-Project”. The R-Project will contain your various R scripts and Sweave files. You create a R-Project by going to File>New>R-Project. In the window that opens, give your R-project a descriptive name.
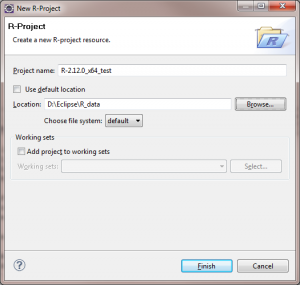
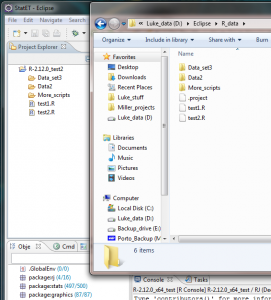
The default location to save the R-project files will be the workspace you created when you first started Eclipse. This may not be ideal for you, because it means that any R-script files you create in Eclipse will be stored in that folder. I prefer to have my script files reside in the same folder as my data files. As such, I uncheck the “Use default location” option and use the Browse button to point Eclipse to my R data folder. The upshot of this is that the directory structure displayed in Eclipse’s Project Explorer tab will reflect the directory structure of your R data folders. This is shown below.
To write a new R-script, go to File>New>R-Script File. A window will pop up to let you name the file and specify where in your R-Project folder structure the file should be stored. A new editor tab will then open in the Main Eclipse window. Here you can type in your R code and take advantage of the colored syntax highlighting, code completion, and other features that make a real text editor so handy. You can also submit the script file to run in your R session with one click by hitting the “Run File” button just above the text editor tab. There are actually three Run buttons here, one to submit the whole file, one to submit a single line or selected lines, and one to step through each line of your file as you click the button.
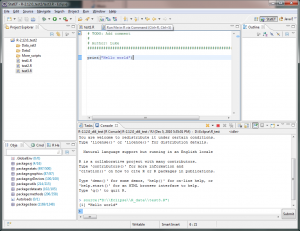
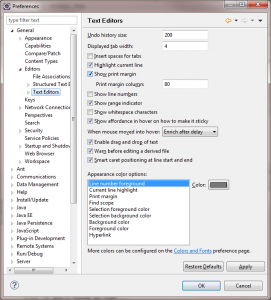
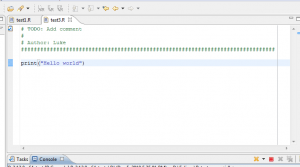
Among the other tweaks that I make to my configuration, I find it helpful to include a visual indicator of the 80-column width in the editor window. Keeping lines of code to less than 80 columns wide makes for nicer printing of hard copies of your files, since a standard sheet of US letter paper with 1 inch margins and 12-point font will just fit 80 columns of text without having to wrap to the next line. To insert a visual guide in the text editor window, go to Window>Preferences, and choose General>Editors>Text Editors. In the Text Editors panel you will find a check box for “Show print margin” above a field for “Print margin column.” Check this box to make a vertical line appear in the text editor window after the 80th column. You can also check the option to show line numbers here. Hit Apply and OK to exit the preferences window.
A note about Java runtime engines.
There are 32-bit and 64-bit Java runtime engines (JRE) available for Windows, and a 64-bit version of Windows can have both installed. In some cases, if you want to run a 64-bit version of Eclipse (not R), you will need to download a 64-bit JRE. If you try to launch 64-bit Eclipse for the first time and it fails, complaining about not being able to find an appropriate JRE, you will probably need to download one. After installing the 64-bit JRE, it may still be necessary to add the 64-bit Java installation to the Windows search path so that Eclipse can find it. 64-bit Java will install in the C:\Program Files\Java folder (not the C:\Program Files (x86)\Java folder, which contains your 32-bit JRE). In my case the install lives in C:\Program Files\Java\jre6\bin. To put this folder in the Windows search path, hit your Windows key and type something like “set path”. You should see the “Edit the system environment variables” option come up in the results. Click on that option.
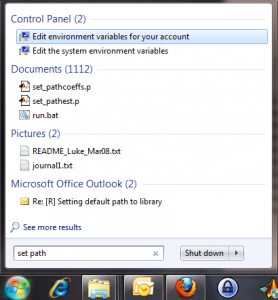
In the window that opens, click on the Environment Variables… button.
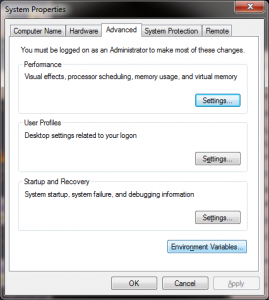
In the window that opens, go to the System Variables in the lower section. Scroll down to the “Path” item, click on it, and hit Edit.
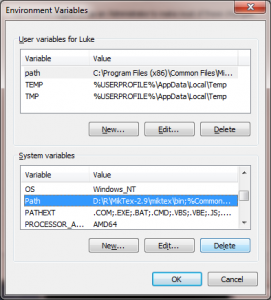
In the Variable value field, insert you cursor and move to the very end of the list. Type a semicolon “;” to divide your new entry from the previous entry. Put in the path to the 64-bit Java install (C:\Program Files\Java\jre6\bin in this case.)