The Eclipse IDE with StatET plugin, developed by Stephen Wahlbrink, is one of the more (maybe the most) full-featured options for running R. I’ve written about this combination before (previous post), but the highlights include a script editor with syntax highlighting, code completion, an integrated graphics window, an advanced debug system, and the best object browser available among the various freely available R development environments. This post outlines the installation of the current StatET 2.0.x version on a Windows 7 x64 system, since the installation process has become slightly more streamlined since earlier versions. The installation procedure is also outlined on the StatET website under the installation section. In particular, the table below outlines the various pieces needed to make this work.
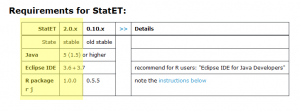
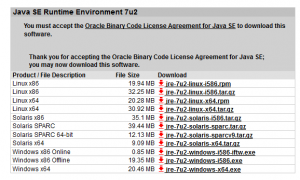
To begin, you need a copy of Eclipse (3.7 recommended currently) and a Java runtime environment (since Eclipse relies on Java to run). The “Eclipse IDE for Java Developers” is the recommended flavor of Eclipse to download. You may have a Java JRE already installed for other purposes, but you need a version of JRE (32-bit or 64-bit) that matches the version of R that you wish to run. This install will use the 64-bit version of R. Install both Eclipse and the Java runtime environment.
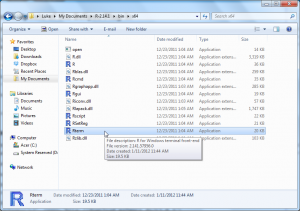
You also need a current version of R (2.14.1 at the time of writing). Install R as usual. To run StatET, you need to install a pair of packages available from the StatET site. To do this, go into your R /bin folder and launch a session of Rterm.exe.
In the Rterm session, type in the following line of code to install the ‘rj’ packages.
install.packages(c("rj","rj.gd"), repos="http://download.walware.de/rj-1.0")
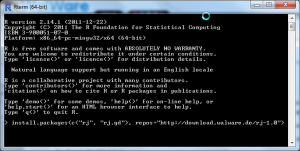
If the rj packages install properly, you should see something like the image below.
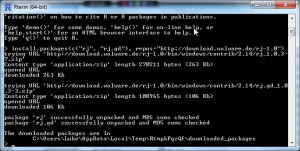
Now that the rj package is installed, R is prepped for use with Eclipse. The next step is to configure Eclipse and install the StatET plugin.
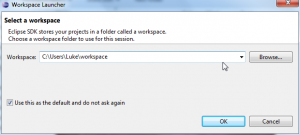
The first time you launch Eclipse, it will ask you to select a workspace. You probably don’t have a workspace already, so Eclipse will suggest a location to create a workspace. The default option is probably fine. Check the box to use this as the default.
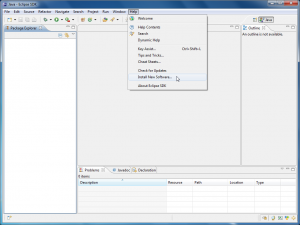
When Eclipse launches, go to the “workbench”. In the menus up top, go to Help>Install New Software.
In the window that opens, click on Add to put in the location of the StatET plugin repository. You need to enter the address for the repository that matches your Eclipse version (3.7 in this case).
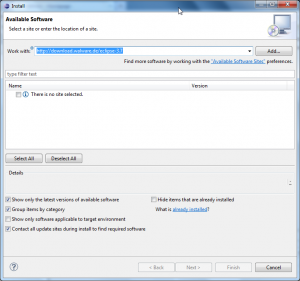
If Eclipse is able to access the walware repository, three listings should appear in the middle of the window. These are the various portions of the StatET software that you may install. It is recommended that you only select the StatET and Utilities choices. Leave the Libraries unchecked for now.
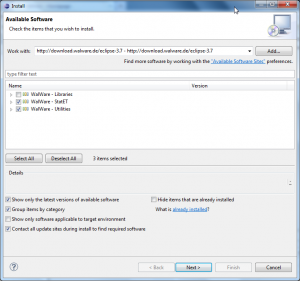
Click on Next through the next few screens and complete the installation for the StatET plugin. During the installation you may be prompted that you are installing “unsigned” software. Click OK and finish the installation. After the installation completes, you will be prompted to Restart Eclipse, go ahead and do that.
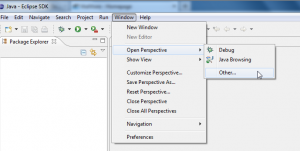
When Eclipse reopens, one of the options on the opening screen should be a a tutorial for StatET. Click on that to open a guide for setting up StatET. Before you work through the steps in the tutorial, you can launch the StatET “perspective”. To do this, go to Window>Open Perspective>Other… In the window that opens, choose StatET from the list.
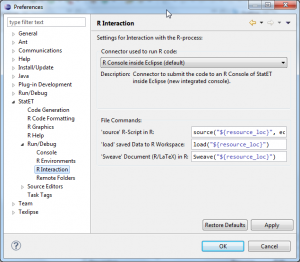
Next you can start going through the steps of the StatET tutorial (recreated here). Begin by going to Windows>Preferences. In the Preferences window, go to the StatET listing on the left, and navigate to R Interaction. Set the Connector use to run R code as R console inside Eclipse (default) if it isn’t already.
The next step is to move to the R Environments section on the left side of the Preferences window. You will need to configure your R installation here. On the right side of the window, click on Add to create the new configuration.
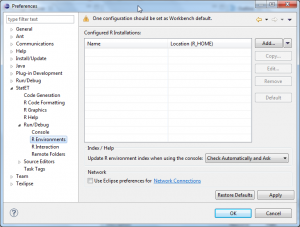
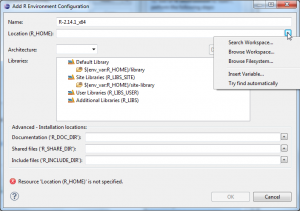
This will open the Add R Environment Configuration window. Give the R environment a descriptive name that tells you what version of R will be launched when you use this environment. In this case I called it R-2.14.1_x64. On the second line of the window, click on the + symbol and select Browse Filesystem… to tell Eclipse where the R installation sits.
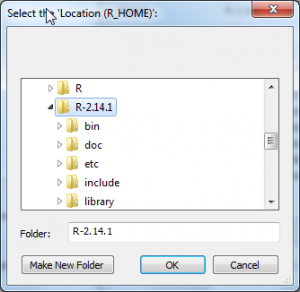
In the window that pops up, navigate to wherever your R installation is. This may be under C:\Program Files or C:\Program Files (x86) or somewhere else if you customized your R installation. Highlight the folder for the R installation and hit okay.
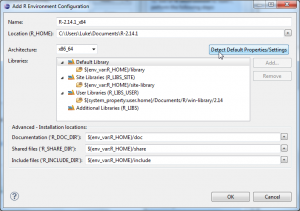
Back in the Add R Environment Configuration window, choose the appropriate architecture for the version of R (32-bit or 64-bit) you want to run. I prefer 64-bit so that R can utilize more RAM, so I set the architecture as x86_64 (instead of i386 for 32-bit). Then you should be able to click on the Detect Default Properties/Settings button to have Eclipse find all of the necessary R locations. After this is accomplished, hit OK to close the window.
With an R environment created, the next step is to create a Run configuration to launch an R session. Go to the menus at the top of the Eclipse window and go to Run>Run Configurations… In the window that opens, double click on the R Console entry on the left, and click on New_configuration below it when it appears.
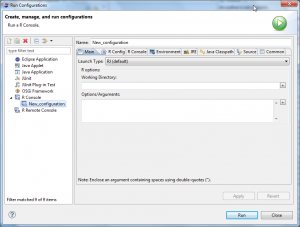
On the right side of the window, start at the top by naming this run configuration with something descriptive. In the Working Directory field, click on the + on the right to browse to the location of your R working directory. In the example below, my R scripts are all stored in C:\Users\Luke\Documents\R, so this will get R to start in that directory. The Options/Arguments field allows you to enter other command line startup options for R. I prefer the –no-save and –no-restore options.
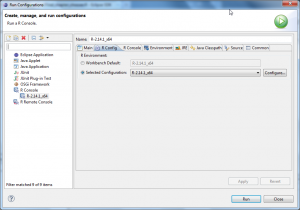
The next tab at the top is the R Config tab. Here you choose which R configuration you want associated with this run configuration. As time goes on, you may wish to keep multiple Run configurations around, maybe one that runs an older version of R, or maybe a 32-bit version instead of 64-bit. If you only have one configuration, you’ll only have one choice on this tab.
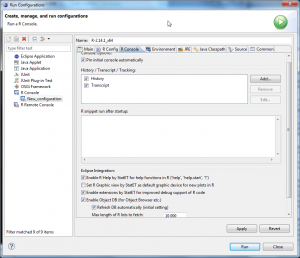
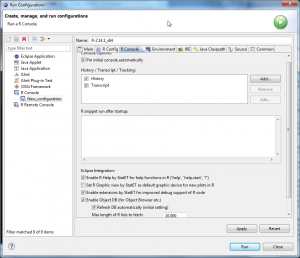
Next click on the tab on top that says R Console. In this tab, check the boxes for “Pin initial console automatically”, along with the “History” and “Transcript” boxes. You may need to scroll the window downward to find the other options shown in the image below. All of these options are my personal preferences, none of them are required for functioning.
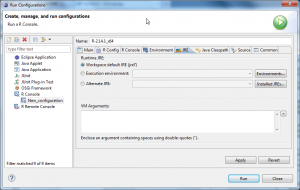
The next tab to move to is the JRE tab. This tab is important if you have multiple R versions you want to run, and multiple Java JRE’s installed (32-bit and 64-bit). The R architecture you choose to run (32-bit or 64-bit) needs to match the JRE architecture (32-bit or 64-bit). The nitty-gritty details are outlined here if you run into problems at this point.
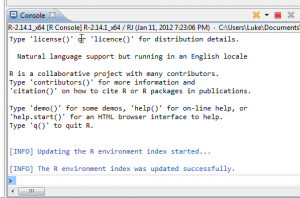
When all of the Run Configuration options are set, click the Run button at the bottom of the window. This should launch an R console within the Eclipse window. You should see the normal R startup information in the R console. Eclipse will ask you if you want to index the R environment. Choose the “global” option and hit okay. Eclipse will then index the R libraries, and this could take several minutes if you have a lot of packages installed. Once finished, you’ll see a message, and you can begin using R.
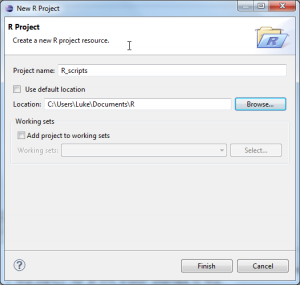
Next, go to the File>New> R Project menu item on the Eclipse window. In the New R Project window that opens, enter a project name. In the location field, use the Browse option and point to the folder on your hard drive where you keep your R scripts. This will allow Eclipse to show the folders in your R scripts folder within the Eclipse window.
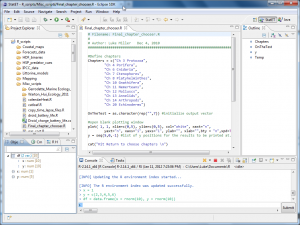
At this point, everything should be up and running and look something like the image below. You can drag any tab in the Eclipse window to re-arrange the locations of the various consoles.
If you run into problems during the install, there is an e-mail help list available for StatET.