I have revised the Open Wave Height Logger electronics assembly video as of March 2020 to include narration (uh-oh) and more information about the programming process and error codes. This video outlines the entire assembly process for soldering the components to the 3 circuit boards of the OWHL Revision C design. The current designs and software to run the OWHL can be found at the OWHL Github repository.
One important update is that the OWHL works with the Optiboot bootloader program, so you can install Optiboot through Arduino’s Board Manager facilities instead of the old method of editing the boards.txt file. Hopefully this streamlines the software end of things for you.
If you need to install the Optiboot bootloader software, go to https://github.com/Optiboot/optiboot/releases and copy the URL link for the current release’s .json file (for Optiboot v8 this is https://github.com/Optiboot/optiboot/releases/download/v8.0/package_optiboot_optiboot-additional_index.json)
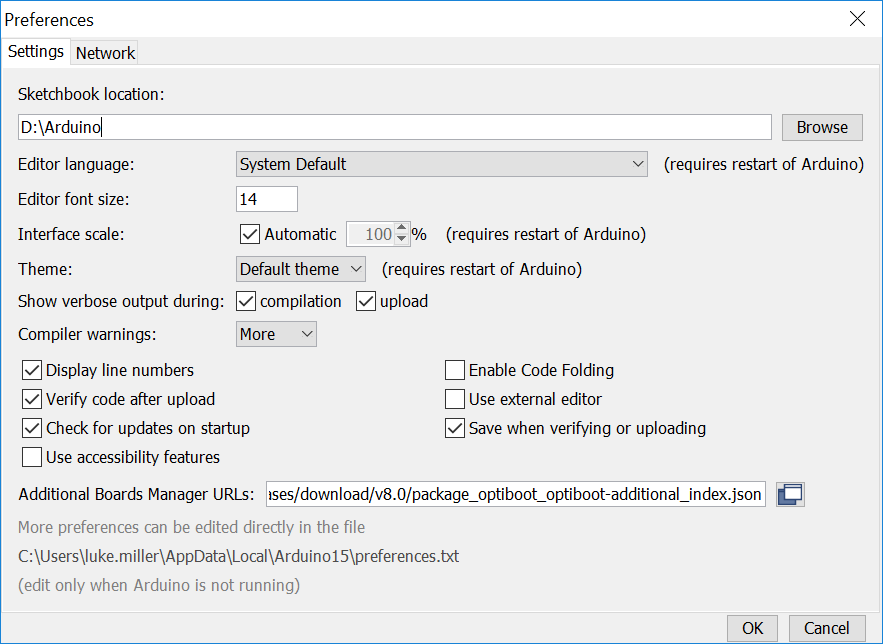
Take that URL link, open the Arduino software Preferences window, and paste the .json URL into the “Additional Boards Manager URLs:” field, and then hit OK.
After that, you can go to the Arduino Tools>Board: menu item and choose Boards Manager. In the Boards Manager window search bar, type ‘optiboot’ and the Optiboot profile should appear. Mouse over it, and an Install button should activate. Install Optiboot now.

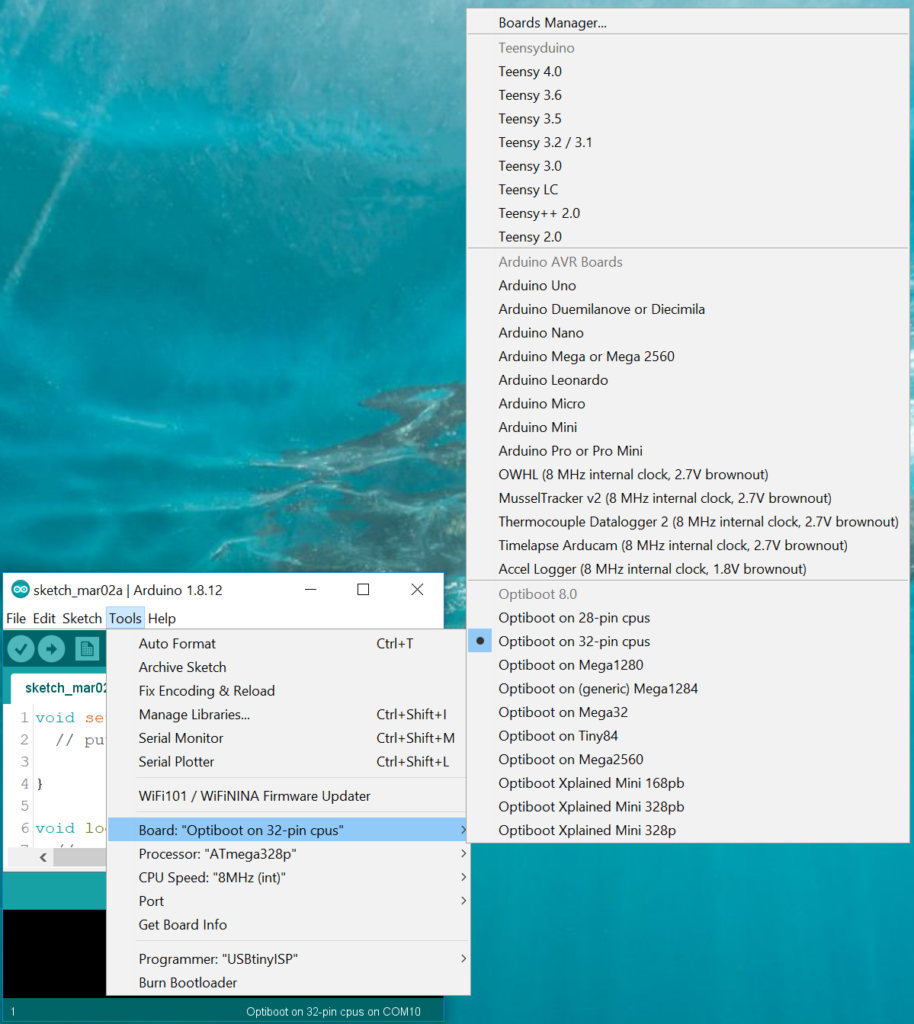
When Optiboot is installed, you’ll now find new entries in the Arduino Tools>Boards: menu item. For OWHL, you’ll want to first choose the “Optiboot on 32-pin cpus” option. Close the Tools>Boards: menu, and reopen it to refresh the menu items. Now you should also be able to choose the Processor (choose “ATmega328p”), and the CPU Speed (choose “8MHz (int)”). That sets up the Arduino software to produce a bootloader program that will tell the OWHL to run on its internal 8MHz oscillator, which matches the way the hardware is set up on the OWHL circuit board (there is no external 16MHz oscillator like those found on a normal Arduino Uno, for example).
After you’ve set up the correct board setup for the OWHL, you can use a ISP programmer (like an AVR Pocket Programmer) to burn the bootloader to a newly assembled OWHL using the Arduino Tools>Burn Bootloader option at the bottom of the menu. Skip to the 8:30 to 10:30 segment in the video above to see the bootloader installation and bootloader burning process carried out.